“Eating your own dog food“ or “dogfooding” is the practice of an organisation using its own product. Here at Ubisecure, we use our own Identity Platform as the Identity and Access Management (IAM) backend for Atlassian Service Management, which is a collaboration application used by Ubisecure support, employees, and selected partners.
The IAM backend is an Identity-as-a-Service (IDaaS) private cloud instance running a number of Identity Platform capabilities like Single Sign-On and connecting an enterprise Identity Provider (Microsoft Azure AD) are delivered via the SSO and Customer ID components. Users can register, create an account, and then sign in with their credentials.
Recently, we decided to improve the sign in user experience. Initially, we set up “Sign in with Microsoft” for Ubisecure employees only. We’re now considering extending this to our partners too.
Microsoft Azure AD
In the case of business users, “Sign in with Microsoft” is implemented by Microsoft Azure AD – the IAM backend and user directory for systems like Office 365, Microsoft Teams, SharePoint Online and many others.
At Ubisecure we use Office 365 for day-to-day tasks, so letting users sign in with their familiar Office 365 account using single sign-on (SSO) improves the user experience.
Integration
Microsoft Azure AD is a standards-based OpenID Connect provider, and for this integration Ubisecure SSO acts as the OpenID Connect Client. Both Microsoft Azure AD and Ubisecure SSO implement the OpenID Connect specification, which enables interoperability between the products. Example integration steps are described in detail in this article on Ubisecure’s Developer Portal.
The first step is to choose between single tenant and multi-tenant. Since in this first phase the service is for Ubisecure staff only, we selected the single tenant service. The TenantID will be part of the endpoint URLs (as seen in the images below).
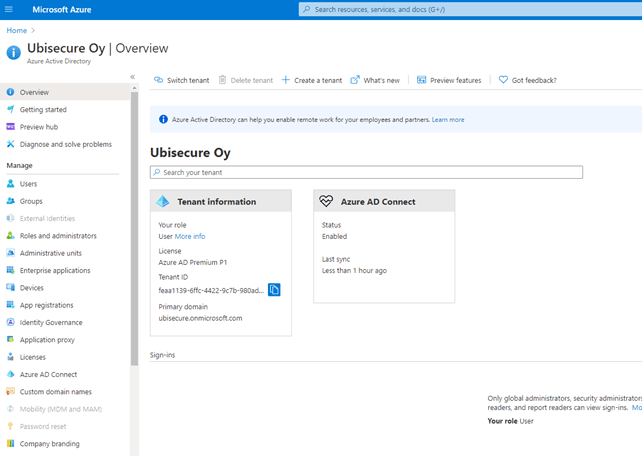
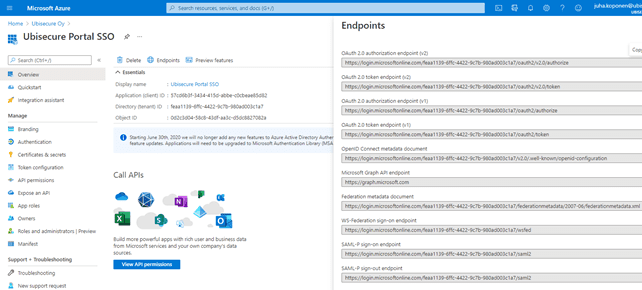
The OpenID Connect authentication method needs to be created using the SSO Management API. The Azure AD metadata is available at “OpenID Connect metadata document” endpoint. The SSO management API is used also to register metadata and as second step jwks_keys. After this, we can get the OpenID Connect registration request from SSO and type the redirect URI into the Azure portal.
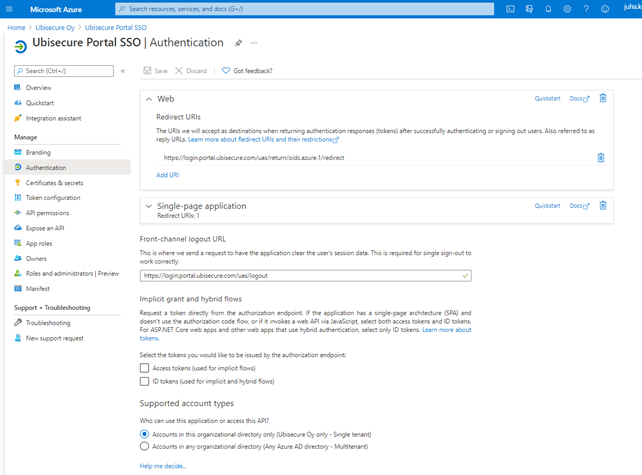
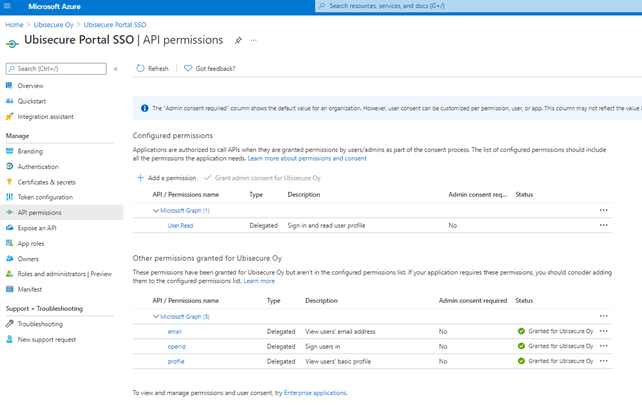
We modified API permissions to get all required claims from Azure AD. In particular, the user email address is required since we use it for mapping user accounts. Here is a snapshot of what permissions we set.
Account mapping
The accounts registered in Ubisecure Customer ID are all registered with validated, up to date email addresses. The same applies to Azure AD. With these criteria, the simplest approach to mapping Azure AD accounts to Ubisecure Customer ID accounts is to use email address as the mapping element.
User experience
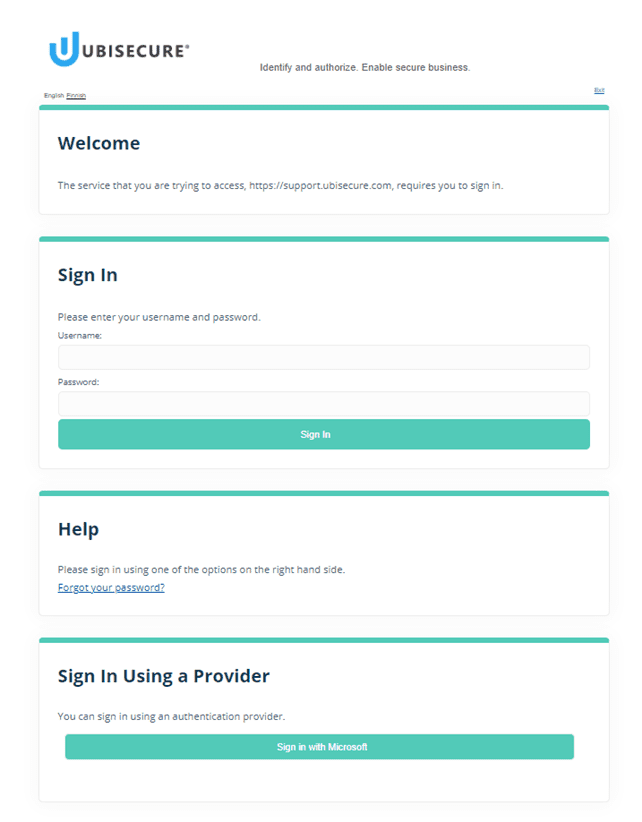
After setting up the integration, a “Sign in with Microsoft” button appears on the Ubisecure SSO login screen. Users who select the button will be redirected to Azure AD for sign in. On their first sign in, users will see a consent confirmation screen and will need to accept. On following visits, users will experience seamless single sign-on (SSO).
For help initiating your own “Sign in with Microsoft” option, get in touch. Find out which other Identity Providers Ubisecure supports on our Identity Providers page.


About The Author: Juha Koponen
Juha is Operations Manager at Ubisecure.
More posts by Juha Koponen